Building a Blog with Next.js and MDX
Originally published on Aug 15, 2020
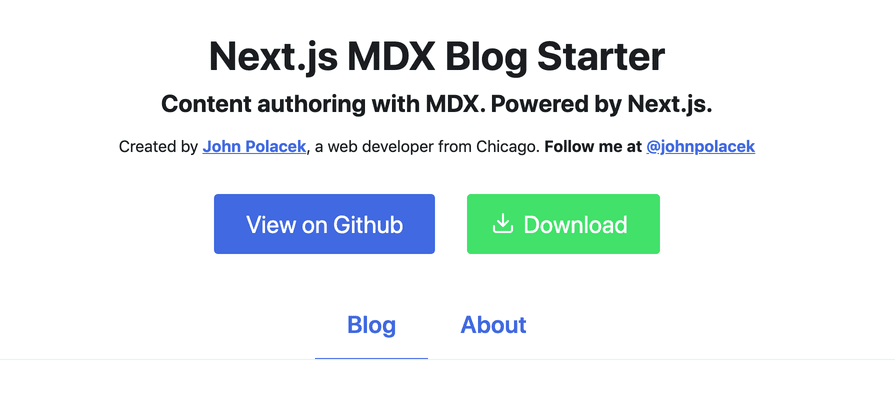
I’ve re-built my blog again, this time in Next.js with content authored in MDX.
I reach for Next.js because it scales to what I need it to do. It can build a simple static blog like this one, or a SaaS app with parameterized routing, serverless backet, user auth and an integrated API (see my Hello Next App project for example). I pretty much use it for everything new I’m building on the web these days.
MDX is a powerful tool for authoring content. It gives you everything that authoring your content in markdown does, but with the added superpower of being able to drop in React components at will. For a web developer blog, that’s obviously pretty appealing.
Here’s the stack:
Rather than just update my blog, I decided to open source a starter project that people can use to build their own Next.js MDX blogs and write about it as I go.
To get started, I made a fresh fork of my Project Starter and deleted the stuff I didn’t need. This left me with a nice base of Next.js with Theme UI for some basic styling and UI component primitives.
Looking at my current blog, I went and abstracted some properties into a config file that would provide a quick way for people to customize their blog by updating a few settings.
blog.config.js
module.exports = {url: "https://nextjs-mdx-blog-starter.vercel.app/",title: "Next.js MDX Blog Starter",subtitle: "Content authoring with MDX. Powered by Next.js.", // longDescription : appears in landing page meta descriptiondescription:"Next.js MDX Blog Starter for building blogs with Next.js and MDX, including Theme UI Component Design System, Vercel Deployment and more.",author: "John Polacek",analytics: "", // put your google analytics code here to add trackingshareImage: "https://nextjs-mdx-blog-starter.vercel.app/",shareImageAlt: "Next.js MDX Blog Starter Screenshot",postsPerPage: 8,showDate: true, // if you would like the date to appear on the blog postsdisqus: "", // your disqus shortname, remove if you don't use disqus}
Next up, I took a look at the official Next.js Blog Starter example.
I grabbed their api.js file and copied it into my project and installed the gray-matter dependency for parsing the front matter in the blog post markdown files. I changed the directory to point to the place where I’ll be storing the mdx files and updated the file extension to
..mdx
src/api.js
import fs from "fs"import { join } from "path"import matter from "gray-matter"const postsDirectory = join(process.cwd(), "src/markdown/posts")export function getPostSlugs() {return fs.readdirSync(postsDirectory)}export function getPostBySlug(slug, fields = []) {const realSlug = slug.replace(/\.mdx$/, "")const fullPath = join(postsDirectory, `${realSlug}.mdx`)const fileContents = fs.readFileSync(fullPath, "utf8")const { data, content } = matter(fileContents)const items = {}// Ensure only the minimal needed data is exposedfields.forEach((field) => {if (field === "slug") {items[field] = realSlug}if (field === "content") {items[field] = content}if (data[field]) {items[field] = data[field]}})return items}export function getAllPosts(fields = []) {const slugs = getPostSlugs()const posts = slugs.map((slug) => getPostBySlug(slug, fields))// sort posts by date in descending order.sort((post1, post2) => (post1.date > post2.date ? "-1" : "1"))return posts}
I also copied the posts directory from the Next.js Blog Starter example, then changed their file extensions to
so I’d have some markdown files to work with. I also changed the fields in the front matter a bit to suit my own needs..mdx
Next, I updated
page in my project use the settings fromindex.js
and to list the blog posts on the landing page based on the Next.js example.blog.config.js
pages/index.js
import config from "../blog.config"import Wrapper from "../src/layout/Wrapper"import Posts from "../src/views/Posts"import { getAllPosts } from "../src/api"const PostsPage = ({ posts, prevPosts, nextPosts }) => (<Wrapperurl="/"title={config.title}description={config.description}imageUrl={config.shareImage}imageAlt={config.shareImageAlt}><Posts posts={posts} prevPosts={prevPosts} nextPosts={nextPosts} /></Wrapper>)export async function getStaticProps() {const posts = getAllPosts(["title","date","slug","author","coverImage","coverImageAlt","excerpt","draft",])const startIndex = 0const endIndex = config.postsPerPageconst prevPosts = nullconst nextPosts = endIndex >= posts.length ? null : 2return {props: { posts: posts.slice(startIndex, endIndex), prevPosts, nextPosts },}}export default PostsPage
Now that we are loading the posts data, we create a Posts component with a paginated list view of blog posts. We have allowed for a draft field in the front matter of our posts to enable us to mark it as unpublished so it will only be visible in the local dev environment.
src/view/Posts.js
import MDX from "@mdx-js/runtime"import { Flex, Box, Heading, Text, Image } from "theme-ui"import Container from "../ui/Container"import DraftBadge from "../ui/DraftBadge"import Link from "next/link"const Posts = ({ posts, prevPosts, nextPosts }) => {const isLocal = process.env.NODE_ENV === "development"return (<Container>{posts &&posts.filter((post) => {return isLocal || !post.draft}).map((post) => (<Box sx={{ pb: 5 }} key={post.slug}><Heading sx={{ pb: 2, position: "relative" }}>{post.draft && <DraftBadge />}<Link href={"/" + post.slug} passHref><a>{post.title}</a></Link></Heading>{post.coverImage && (<Imagesx={{mt: 2,mb: 3,border: "1px solid",borderColor: "rgba(0,0,0,.1)",}}src={post.coverImage}alt={post.coverImageAlt || ""}/>)}<Box sx={{ pb: 3 }}><MDX>{post.excerpt}</MDX></Box><Link href={"/" + post.slug} passHref><a>Read more...</a></Link></Box>))}<Flex sx={{ fontStyle: "italic" }}><Box sx={{ width: "50%", py: 3, textAlign: "left" }}>{prevPosts !== null && (<Link href={"/blog/" + prevPosts} passHref><a>« see newer posts</a></Link>)}</Box><Box sx={{ width: "50%", py: 3, pr: 3, textAlign: "right" }}>{nextPosts !== null && (<Link href={"/blog/" + nextPosts} passHref><a>see older posts »</a></Link>)}</Box></Flex></Container>)}export default Posts
Now to create a page to render the individual posts, we start from the Next.js Blog Starter example and make our own version.
pages/[slug].js
import Wrapper from "../src/layout/Wrapper"import BlogPost from "../src/views/BlogPost"import config from "../blog.config.js"import { getPostBySlug, getAllPosts } from "../src/api"const PostPage = ({ post }) => (<Wrapperurl="/"title={config.title + " | " + post.title}description={post.excerpt}imageUrl={config.url + post.coverImage}imageAlt={post.coverImageAlt}><BlogPost post={post} /></Wrapper>)export async function getStaticProps({ params }) {const post = getPostBySlug(params.slug, ["title","excerpt","date","slug","author","content","coverImage","coverImageAlt","draft",])return {props: { post },}}export async function getStaticPaths() {const posts = getAllPosts(["slug"])return {paths: posts.map((post) => {return {params: { ...post },}}),fallback: false,}}export default PostPage
Next we create a
component to view our individual blog post. The key difference from the Next.js Blog Starter example is we useBlogPost
to parse the MDX content.@mdx-js/runtime
To use React components directly in our statically built blog posts, we have to explicitly pass them to the MDX runtime as a components prop. Initially, we have passed a basic
component and two components for syntax highlighting (for more info, Syntax Highlighting in MDX). As you use more components in your blog posts, you would pass them in here.<Box />
We have also included an option to add Disqus comments if enabled in the blog config.
src/views/BlogPost.js
import MDX from "@mdx-js/runtime"import config from "../../blog.config"import { DiscussionEmbed } from "disqus-react"import { Box, Text, Heading, Image } from "theme-ui"import Link from "next/link"import Container from "../ui/Container"import CodeBlock from "../ui/CodeBlock"import DraftBadge from "../ui/DraftBadge"const BlogPost = ({ post }) => {const isLocal = process.env.NODE_ENV === "development"const components = {Box: (props) => <Box {...props} />,pre: (props) => <div {...props} />,code: CodeBlock,}return (<Container>{!isLocal && post.draft ? (<Text sx={{ fontSize: 2, color: "#666" }}>This post has not yet been published. Please try again later.</Text>) : (<><Box sx={{ pb: [3, 4] }}><Heading as="h1" sx={{ fontSize: [5, 6], position: "relative" }}>{post.draft && (<Box sx={{ top: "10px", right: 1, position: "relative" }}><DraftBadge /></Box>)}{post.title}</Heading>{config.showDate && (<Text sx={{ fontStyle: "italic" }}>Originally published on{" "}{new Date(post.date).toLocaleDateString()}</Text>)}</Box>{post.coverImage && (<Imagesx={{mb: 3,border: "1px solid",borderColor: "rgba(0,0,0,.1)",}}src={post.coverImage}alt={post.coverImageAlt || ""}/>)}<MDX components={components}>{post.content}</MDX>{typeof config.disqus === "string" && config.disqus !== "" && (<Boxsx={{pt: 4,mt: 5,borderTop: "2px solid",borderColor: "rgba(0,0,0,.1)",}}><DiscussionEmbedshortname={config.disqus}config={{url: config.url + post.slug,identifier: post.slug,title: post.title,language: "en",}}/></Box>)}</>)}</Container>)}export default BlogPost
You will notice use primitive UI components from Theme UI like
andBox
. We can style with theHeading
prop (read more here). This will automatically generate CSS classes that get treated as critical path CSS for blog post pages.sx
Those arrays that we pass as properties get compiled as responsive styles corresponding to our design theme settings. We could abstract them as variants in our theme, but I feel like I’m already throwing too much at you, so let’s move on.
As with anything in modern web development, there is some special babel/webpack config sauce that we need to apply to make our environment happy.
next.config.js
const withMDX = require("@next/mdx")({extension: /\.mdx?$/,})module.exports = withMDX({pageExtensions: ["js", "jsx", "md", "mdx"],webpack: (config, { isServer }) => {// Fixes npm packages (mdx) that depend on `fs` moduleif (!isServer) {config.node = {fs: "empty",}}return config},})
Ok we have the blog up and running, but there are some additional things we can do to finish up our blog.
Document Head and Header
We can pass the post data and data from our config into our document head for search engines to read and sharing on social media.
src/layout/Head.js
import Head from "next/head"import PropTypes from "prop-types"import config from "../../blog.config"const DocHead = (props) => (<><Head><title>{props.title}</title><link rel="icon" type="image/x-icon" href="/favicon.ico" /><link rel="canonical" href={props.url} /><meta name="description" content={props.description} /><meta property="og:title" content={props.title} /><meta property="og:description" content={props.description} />{props.imageUrl && <meta property="og:image" content={props.imageUrl} />}{props.imageAlt && <meta property="og:image:alt" content={props.imageAlt} />}<meta property="og:url" content={props.url} /><metaname="twitter:card"content={props.imageUrl ? "summary_large_image" : "summary"}/><meta name="twitter:site" content={config.twitter} /><meta name="twitter:creator" content={config.twitter} /><meta name="twitter:title" content={props.title} /><meta name="twitter:description" content={props.description} />{props.imageUrl && <meta property="twitter:image" content={props.imageUrl} />}{props.imageAlt && (<meta property="twitter:image:alt" content={props.imageAlt} />)}</Head></>)DocHead.propTypes = {title: PropTypes.string.isRequired,description: PropTypes.string.isRequired,url: PropTypes.string.isRequired,imageUrl: PropTypes.string,imageAlt: PropTypes.string,twitter: PropTypes.string,}export default DocHead
Other Pages
We can use .mdx to author content on other pages, such as an About page for example.
pages/about.js
import Wrapper from "../src/layout/Wrapper"import About from "../src/views/About"import config from "../blog.config.js"export default () => (<Wrapperurl="/about"title={config.title + " | About"}description={"Learn more about " + config.title}>><About /></Wrapper>)
src/views/About.js
import { MDXProvider } from "@mdx-js/react"import MarkdownContent from "../mdx/about.mdx"import Container from "../ui/Container"const About = (props) => {return (<MDXProvider><Container><MarkdownContent /></Container></MDXProvider>)}export default About
src/mdx/about.mdx
I created Next.js MDX Blog Starter when I decided to convert my own blog at [johnpolacek.com](/) to use Next.js and MDX. I've become a big fan of Next.js and pretty much use it for everything new I’m building on the web these days...
Also, to enable easier customization, the
component uses values set in the config and blurb content written in mdx.Header
Deploy
If you wish to use Vercel for deployment and you already have an account, or after you sign up for an account, deploy with
.vercel --deploy
Code Formatting
Prettier is included with this project as a dev dependency. If you don’t want to worry about formatting your own code, use
to get your code auto-formatted every time you save. You can adjust the code style settings in thenpm run format-watch
config file..prettier